SiteSpect's Visual Editor allows you to make many changes to your webpages to update its visual appearance. In the default state, these experiences are designed to be shown to all users, but it is possible to include criteria to target specific groups of users or behaviours.
Build your Visual Editor Campaign:
1) Open your site in SiteSpect's Visual Editor.
2) Navigate to the page(s) that contain the element you wish to modify using Go To Page, Preview mode, or right click > 'Click Element' in the Visual Editor.
3) Hover over the element(s) you wish to update and select it with a left click. Once selected, the element will have an orange border. A right click within this border will present you with options to modify the element.
4) Select the Edit options you need to make the changes you require. This can be as simple as a single edit, or you can layer multiple edit methods together across multiple pages to build the experience you need. Utilising Page Categories will enable you to target your changes to specific page groups or templates.
6) It is possible to have multiple variation groups within your Visual Editor campaign, which can be added in the AB Build Flow before launching the Visual Editor.
7) Once you have completed your changes in the Visual Editor, save them using the SAVE button in the top right of the page. Once the save is complete, the button copy will update to SAVED to reflect this.
8) It is now safe to exit the Visual Editor back to the AB Build Flow.
Adding Criteria to Personalize your Visual Editor Campaign:
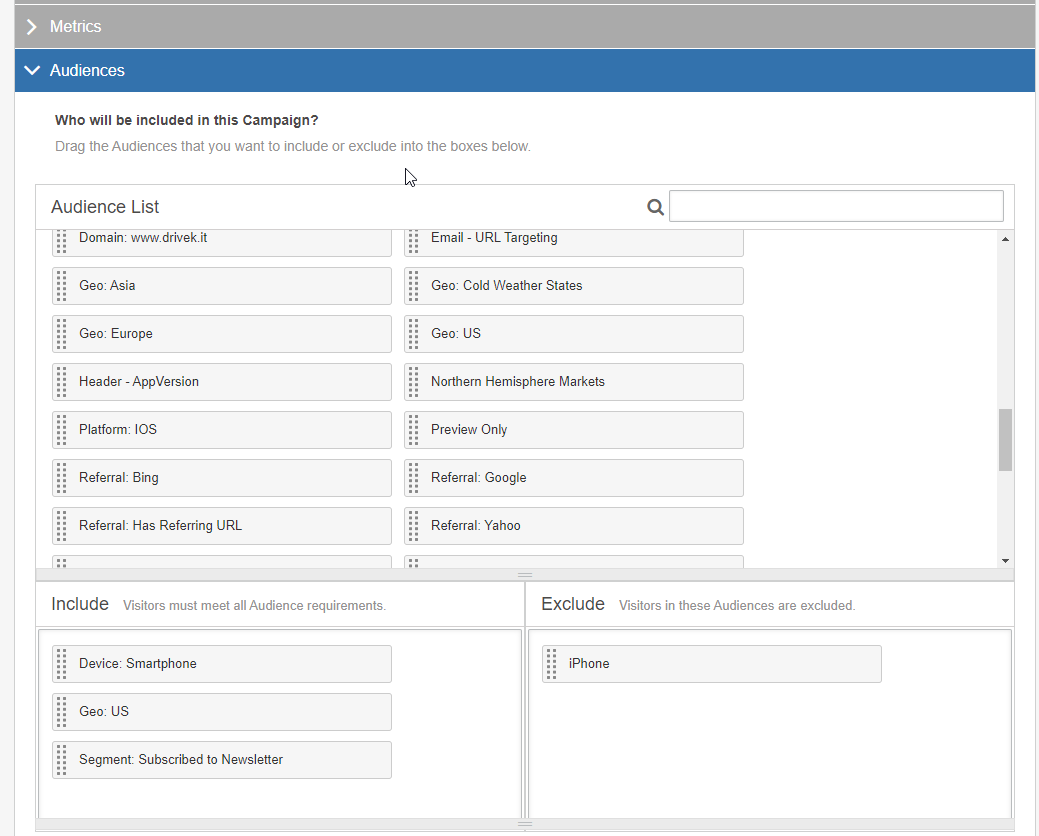
Audiences can be used to manage which users are exposed to your Visual Editor campaign. These criteria can be applied from the Audience section within the AB Build Flow once you have SAVED and EXITED the Visual Editor.
The audience section references your library of existing audiences to include or exclude specific user types and can be searched by name or tag. An audience include combines audiences with an AND operator while exclude uses an OR. If you need to include two of the same audience type, they should be defined as a single audience, e.g. "UK + US" rather than "UK" AND "US."
In the example below, we are targeting US Smartphone users who are subscribed to our newsletter but excluding anyone on an iPhone device.
URL and Query Parameter triggers can be used to manage landing page experiences for specific user types based on the URL or parameters they arrive with. These can be applied from the Variation section with triggers in the AB Build Flow once you have SAVED and EXITED the Visual Editor.
There are four campaign trigger types that are commonly used to define a URL or query parameter trigger:
- URL Path
- Path - preferable if the site is a single page application (SPA)
- Parameter
- Query - preferable if the site is a single page application (SPA)
Query parameters should only be used to apply changes on the landing page where they are presented. If changes are required later in the user's journey, then using audiences (e.g. entry URL) is preferable to make the change sticky to the user's sessions.
- In order to apply a change for a specific URL or query parameter, make the change in the Visual Editor and return to the Variation section of the AB Build Flow.
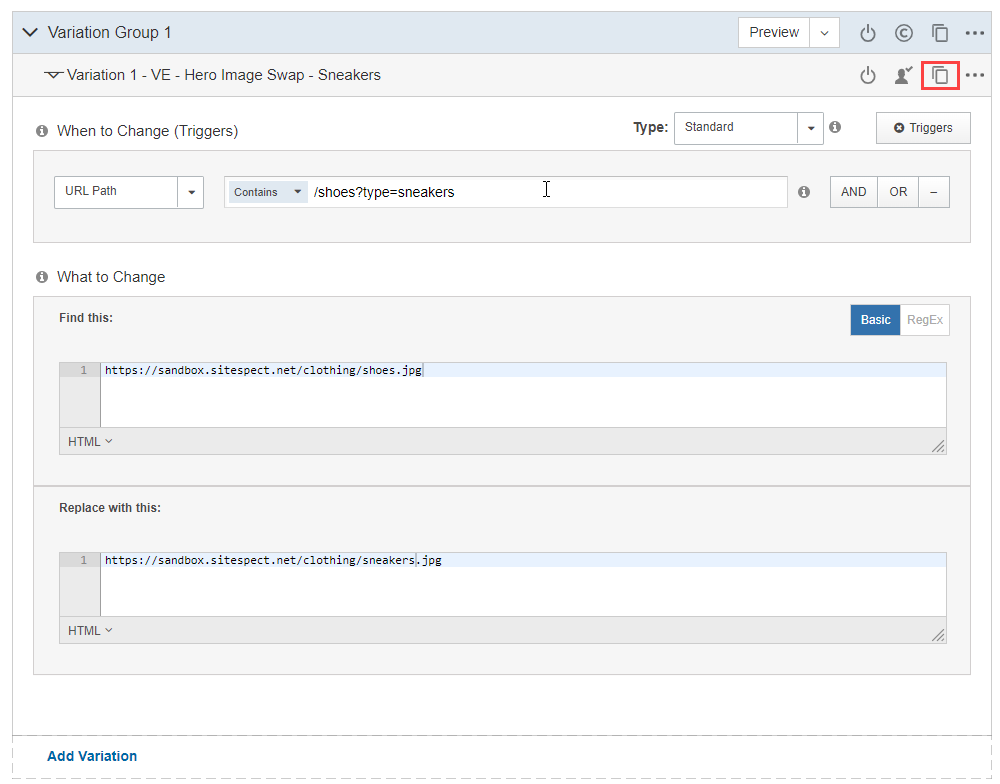
- Select a trigger type to specify a URL or query parameter related to your variation change. In the example below, the Shoes landing page hero image is replaced with an image of sneakers when a user arrives with a "sneakers" query parameter. This is applied using a URL Path trigger.
- If you need to apply similar changes across various pages, you can duplicate your first variation using the Make A Copy button on the right hand side of the variation. Update the triggers and changes as needed on each new variation.
- Save the campaign with the newly updated variants and query parameters. Use SiteSpect Preview to QA and confirm the changes apply as expected.

Personalization Metrics can be used to incorporate user behaviours to manage when changes are shown in SiteSpect. These can be applied from the Variation section with triggers in the AB Build Flow once you have SAVED and EXITED the Visual Editor.
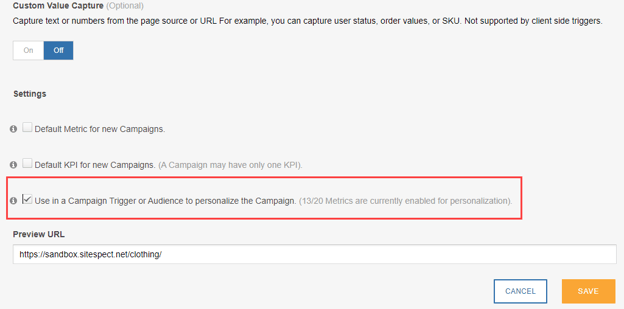
To enable a metric in SiteSpect for Personalization, it must first be set to ‘Use in a Campaign Trigger or Audience to personalize the Campaign’ which can be found at the bottom of each individual metric page.
- In order to apply a change for a specific personalization metric, make the change in the Visual Editor you require and return to the Variation section of the AB Build Flow.
- Select a trigger type of Visitor Behavior from the dropdown and select your personalization metric. Learn more about configuring Visitor Behavior Triggers.
- If you need to apply similar changes across various pages, you can duplicate your first variation using the Make A Copy button on the right hand side of the variation. Update the triggers and changes as needed on each new variation.
- Save the campaign with the newly updated variants and personalization metrics. Use SiteSpect Preview to QA and confirm the changes apply as expected.