The Visual Editor allows you to review your website, determine what you want to change, make your changes, and save a collection of changes to a Variation Group. Keep in mind that when you edit a screen element with the Visual Editor, there are some limits to what you can and cannot do. See Understanding the Visual Editor for more information on its abilities and limits. See Launching the Visual Editor to learn how to open the Visual Editor.
Visual Editor Features
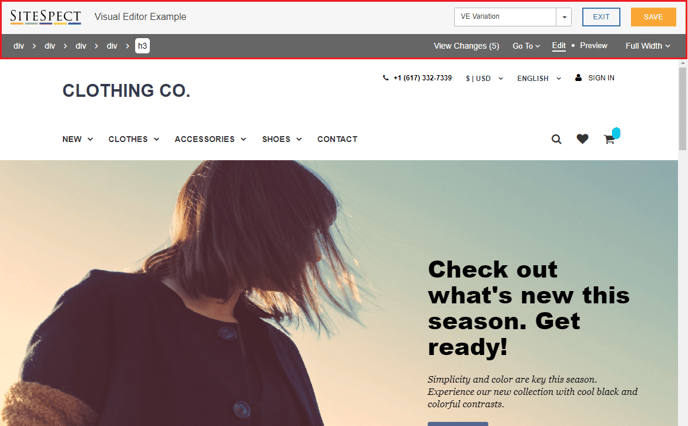
The controls for the Visual Editor are located along the top of the window.
- Campaign Name
- Variation Group Selection
- Change Log
- Go To Page Drop-down
- Unhide (only when a page element is hidden)
- Edit or Preview Mode
- Screen Size Controls
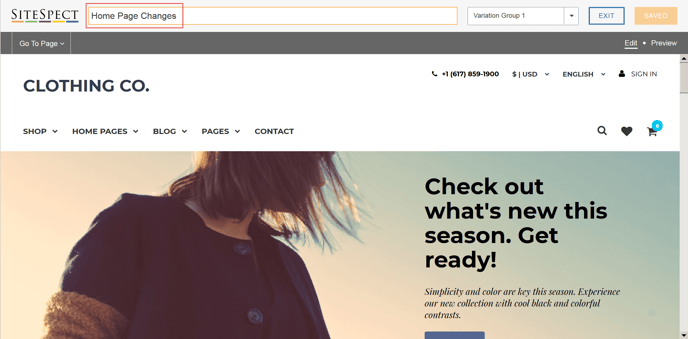
Campaign Name
The name of the Campaign is displayed at the top of the page. If you have not already named the Campaign or if you want to edit the existing name, click on the words New Campaign (or the existing name). Clicking opens a text box that allows you to type. Name the Campaign or make your changes and click anywhere else on the page to complete the name.
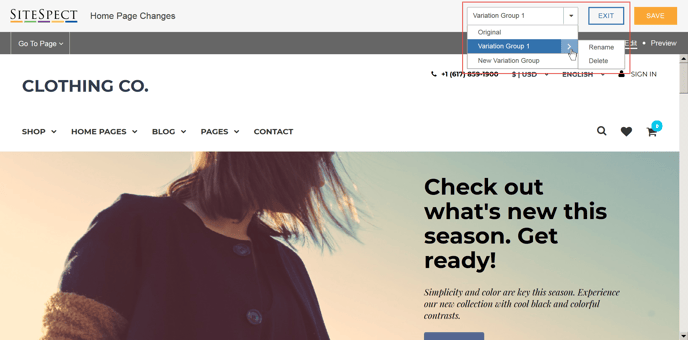
Variation Group Selection
At the top right side of the page, a drop-down menu allows you to select from among the Original or one of the Variation Groups that is displayed in the Visual Editor. In addition, it allows you to add additional Variation Groups, rename them, and delete them.
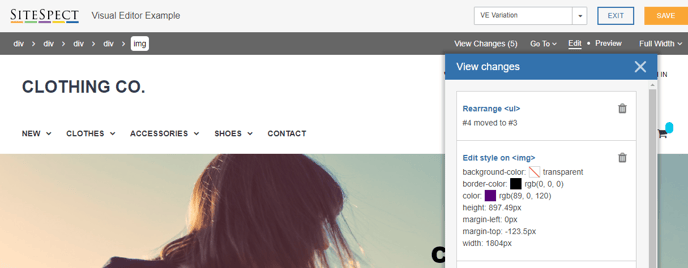
Change Log
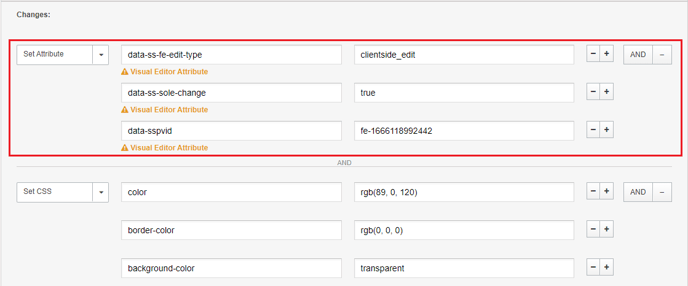
By clicking View Changes, you can view a list of all of the Visual Editor changes that have been made to the current Variation Group. You can hover over a change to select the affected element in an orange dashed border, or click the change to select the element. You can also click the Delete icon on a change to remove those changes entirely.
Go to Page
The Go To drop-down allows you to enter a URL and click Go to move directly to that page.

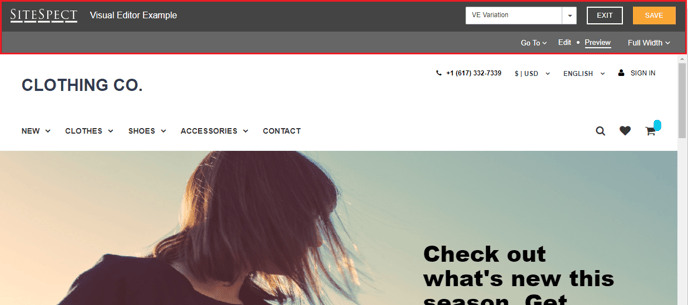
Edit or Preview Mode
The Edit and Preview buttons in the upper right corner of the window determine whether you are in Edit mode or Preview mode. In Edit mode, you can work on changes to the current page. In Preview mode, you can click around the site to view other pages.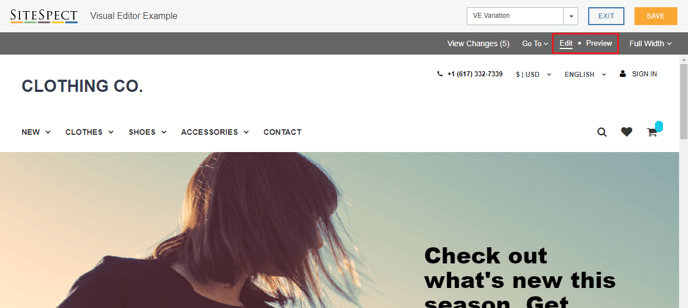
Click Preview to switch to Preview mode. The header changes to a dark color to indicate that you're in a different mode. Review any changes you have made to the page. Then click Edit when you're done to return to Edit mode.
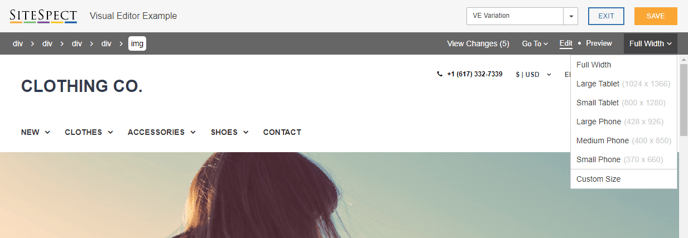
Screen Size Controls
The Screen Size drop-down allows you to preview your site using the screen dimensions of common devices, such as phones, tablets, and full-width desktop screens. You can also select Custom Size to resize the page to your own specific set of dimensions.
Selecting Page Elements
As you move your mouse pointer around the Visual Editor page, different highlighting styles let you know what you can edit, what you can't edit, and what has already been edited.
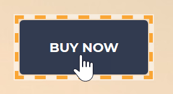
What You Can Edit
When you move your mouse pointer over a page element that you can edit, the element appears with a dotted outline as in the following image.
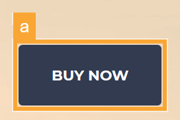
What You Can't Edit
When you move your mouse pointer over a page element that you can't edit, the element appears with a dotted outline as in the following image.

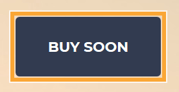
What You Are Editing
When you click your mouse pointer on a page element and begin editing it, the element appears with a solid outline while you are editing it, as in the following image.
What Has Already Been Edited
Page elements that you have edited appear with a solid outline after you have saved them, as in the following image.
Edit Menu
The Edit menu becomes active when you right-click a page element. To view the menu, right-click on a page element such as a text box or an image. The menu displays different selections, depending on what page element you have currently selected.
The following image shows an example of the Edit menu. The Delete Changes menu item is active when you have edited something and allows you to undo the last edits you made to the selected text.
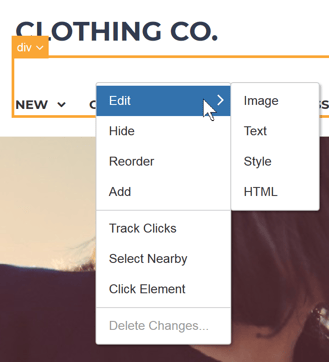
The following table lists the functions on the Edit menu.
| Menu Item | Description |
|---|---|
| Edit Image | Allows you to select an image as a background image for the page element, if it doesn't already have one, or to select a new image to replace an existing one. |
| Edit Text | Allows you to edit the content of the text or edit its formatting. |
| Edit Style | Allows you to edit several formatting options for the selected element. |
| Edit HTML | Opens a window that allows you to edit the selected object in an HTML editor. |
| Hide | Opens the Hide Element dialog that allows you to specify how to hide the currently selected page element. |
| Reorder | Allows you to change the order of the elements within the selected group, for example, on a menu. |
| Add | Allows you to add a page element. |
| Track Clicks | Allows you to track clicks on page elements. |
| Click Element | Provides clickable access to the selected element. This means that when you select an element on the page, and then select Click Element, it works just as if you had clicked on the element on your live website: it takes you to the linked location. |
| Delete Changes | Undoes any changes you have made to the page element during this edit session. |
Editing Text Elements
To edit a text element:
- Select the text element you want to edit. The Edit function works only when you select a page element.
- Select Edit and then Text from the right-click menu. The page element's outline turns solid. In addition, an edit palette opens that contains customary text editing tools. The edit palette is shown below.

- Make any text changes you need. You can change the wording of the text element. In addition, the edit palette allows you to make standard formatting changes.
- Select a Page Category from the drop-down. Page Categories allow you to assign changes to more than one page at a time and are defined using Triggers associated with pages. See Understanding Page Categories for more information.
- Click Save to save your changes or Cancel to abandon them.
Editing Image Elements
The Edit Image function allows you to replace an existing image with another one. It does not allow you to edit the image itself. To edit an image element:
- Select the image element you want to edit. The Edit function works only when you select a page element first.
- Select Edit and then Image from the right-click menu. The Edit Image dialog opens, displaying the image you want to change on the left.
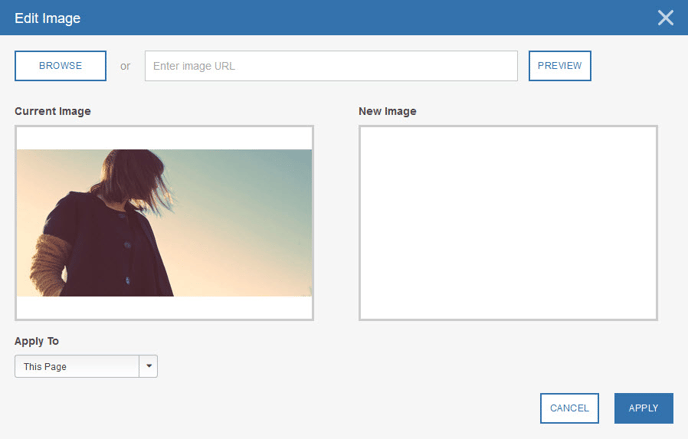
- Click Browse and locate the image you want to use as a replacement and click Open, or type a URL into the Image URL field. The new image appears on the right side of the page.
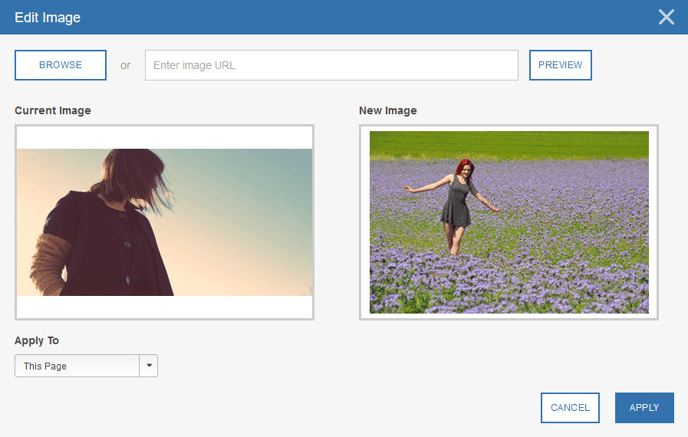
- Select a Page Category from the Apply To drop-down. Page Categories allow you to assign changes to more than one page at a time and are defined using only the Triggers that are associated with pages. See Understanding Page Categories for more information.
- Click Save to save your changes.
Editing HTML
The Edit HTML feature allows you to edit content within an HTML window. To use the Edit HTML feature:
- Select the page element you want to edit. The Edit function works only when you select a page element first.
- Select Edit and then HTML from the right-click menu. The Edit HTML dialog opens, displaying the HTML of the page element you selected.
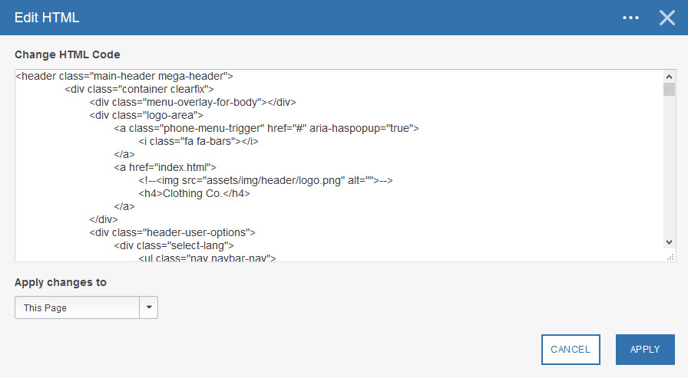
- Select a Page Category from the drop-down. Page Categories allow you to assign changes to more than one page at a time. See Understanding Page Categories for more information.
- Click Save to save your changes.
Hiding/Unhiding Page Elements
The Visual Editor allows you to Hide and Unhide page elements to see how the page will appear without the element. To hide a page element:
- Right-click on the page element.
- Select Hide from the menu. The Hide Element dialog opens.
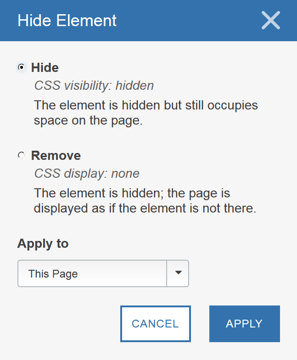
- Select how you want to hide the element:
- Hide: The page element is hidden, but still occupies space on the page.
- Remove: The page element is hidden and the page is displayed as if the element is not there.
- Select a Page Category from the Apply To drop-down. See Understanding Page Categories for more information.
- Click Apply. The page element is hidden. In addition, when you hide page elements, the Unhide menu appears along the top of the Visual Editor. The Unhide menu contains a list of all the page elements that you've hidden.
To unhide a page element, select it from the Unhide menu.
Reordering an Item within a Group
The Visual Editor allows you to reorder the items within a specific group such as a menu or a banner. To reorder:
- Right click on the page where you want to add the element.
- Select Reorder from the pop-up menu. When you do, a palette appears allowing you to click and drag the selected element. The palette contains a setting called Auto-select best element that is selected by default. This feature tells SiteSpect to automatically select the element that it thinks is best for reordering. Uncheck the box to tell SiteSpect to be less restrictive and to allow you more control over what is selected.

- Drag the selected element to its new location.
- Select a Page Category from the drop-down.
- Click Done when you're finished.
Adding a Page Element
The Visual Editor allows you to add a page element to your pages. To add a page element:
- Right click on the page where you want to add the element.
- Select Add from the pop-up menu.
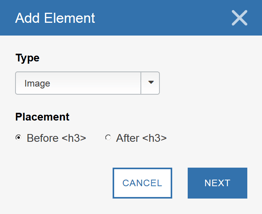
- Select a Type from the drop-down: Image, Text, HTML.
- Select whether the new element should be placed before or after the current element.
- Click Next. When you do, the Visual Editor displays a dialog that allows you to add the element.
- Complete the settings for the new element, select a Page Category from the drop-down, and click Apply.
Tracking Clicks
The Visual Editor allows you to track clicks on certain items on the page. To track clicks:
- Right-click on the item you want to track.
- Select Track Clicks from the pop-up menu. The Track Clicks dialog opens.
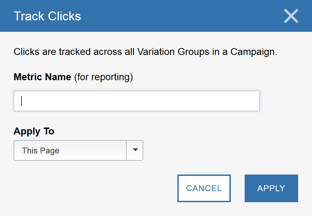
- Enter a Metric Name. SiteSpect will create the Metric when you click Apply.
- Select a Page Category from the drop-down.
- Click Apply. The Metric keeps track of the number of clicks on the page element.
Click Element
When you are working in the Visual Editor, clicking on items doesn't cause the expected behavior because you are editing the page. As such, the Visual Editor allows you to simulate a visitor click. To do so, right-click on the page element you want to click on and select Click Element from the pop-up menu.
Saving Your Changes
Once you are done defining changes:
- Click Save in the upper right corner of the page.
- Click Exit to leave the Visual Editor.