Reorder Elements Using the Visual Editor
SiteSpect's Visual Editor allows you to make many changes to your webpages to update its visual appearance. One such change is the ability Reorder elements on a page or multiple pages across your site.
1) Open your site in SiteSpect's Visual Editor.
2) Navigate to the page(s) that contain the element you wish to modify using Go To Page, Preview mode or right click 'Click Element' for the Visual Editor.
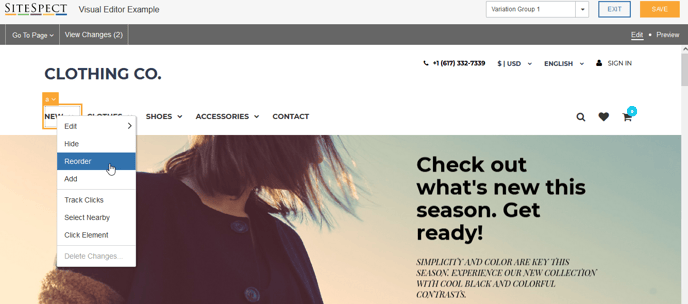
3) Hover over the element you wish to Reorder and select it with a left click. Once selected the element will have an orange border. A right click within this border will present you with options to modify the element.
4) Select the Edit > Reorder option.

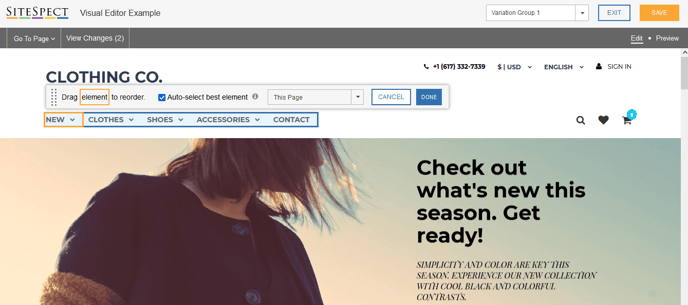
5) The Visual Editor will then present you with the selected item for Reorder outlined in orange. The parent element will be highlighted in blue indicating where it is possible to reposition your element within.

Note: SiteSpect will automatically select the element it thinks is best for reordering, based on the page structure. This may not always be the element you selected. To make SiteSpect's selection less restrictive, un-check the Auto-select best element box in the Reorder toolbar.
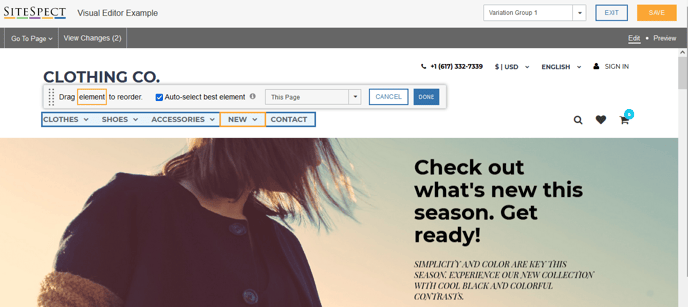
6) Click and hold your selected orange element and drag it within the selected blue zone to its new position. Releasing the click will allow the orange element to stick in its new position.

7) Once the change has been applied to the selected page(s) via the Page Category dropdown click Done. You can now return to the page with your reordered change.
