Table of contents
- Main Settings: Audiences and Global Variations
- Spoofing Settings: emulate user attributes
- Campaign Settings: preview Overlay Campaigns
Preview Settings allow you to customize the preview experience. Specifically, you can evaluate Audiences, which allow you to see if your Audience matches for the selected Campaign. You can also spoof the visitor, providing different attributes such as location, device, or headers so that you can see the experience for such a visitor. Finally, the Campaigns tab allows you to assign a preview session to an overlay experience, in other words preview multiple campaigns.
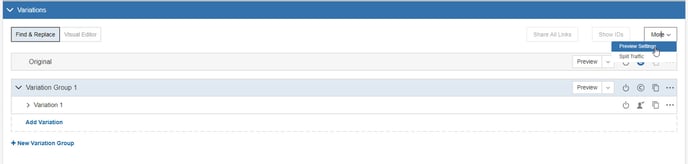
To specify preview settings, select Preview Settings from the three-dot menu for the Variation Group.
The Preview Settings dialog opens.
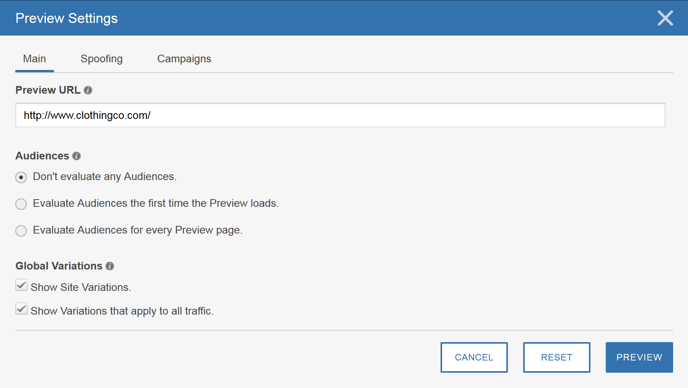
Main Settings
The Main tab allows you to specify the following settings, which remain the same while you are previewing the current Campaign. If you navigate away from the Campaign, settings return to their defaults. The next time you preview, SiteSpect displays default preview settings.
Preview URL
Preview URL is the page where you want the preview to begin. By default, it displays the preview you have specified for the Campaign.
Audiences
Preview ignores Audiences by default. The Audiences settings allow you to evaluate whether or not Audiences assigned to the Campaign match the person previewing the Campaign. Normally, SiteSpect evaluates Audiences only on the initial assignment but you can also evaluate on every Preview page to validate visit history and visitor behavior scenarios. Combining spoofing with Audience evaluation gives you a lot of power to validate and QA before running a Campaign.
For example, you might have an Audience that includes in a Campaign only visitors using Firefox. In this case, you would select Evaluate Audiences the first time the Preview loads and confirm that this works as expected. Upon preview, the Preview Diagnostics tab shows if the Audience has failed or matched. If you are using Chrome, the Preview Diagnostics tab shows a red X for that Audience row. Using the Chrome browser, you could select Firefox under spoofing and launch the preview which then shows that the Audience has matched successfully.
In another more complex example, you may want to validate a Visitor Behavior Audience, such as a Metric that measures clicking an Add to Cart button. Since the preview starts a new session/visit, the Audience fails to match on the first Preview page because the Add to Cart button has not been clicked. In this case, you would want to select Evaluate Audiences for every Preview Page and though the Preview Diagnostics tab shows that the Audience fails initially, when you click Add to Cart, the Audience then shows that it matched successfully.
Don’t evaluate any Audiences: Tells SiteSpect not to consider any Audiences assigned to the Campaign when previewing. You may have defined Audiences for the Campaign you are previewing, but SiteSpect does not take them into account when displaying the preview.
Evaluate Audiences the first time the Preview loads: Tells SiteSpect to consider Audiences only upon first page load of the preview. SiteSpect does not evaluate Audiences when you navigate to a new page. This is how SiteSpect works all the time.
Evaluate Audiences for every Preview page: Tells SiteSpect to evaluate Audiences on each page request. SiteSpect keeps trying to evaluate the Audience on each page you navigate to.
If you don’t match on the first page, you may match on a subsequent page. You may want the Audience to match on shoes, but first page doesn’t have shoes. Third page you land on does.
Global Variations
Global Variations settings determine when to show Variations that apply to all traffic.
- Show Site Variations: Apply all active Site Variations while displaying the preview.
- Show Variations that apply to all traffic: Apply all existing QuickChange Variations during the preview session.
Spoofing Settings
Spoofing settings allow you to mimic specific qualities about a visitor. Keep in mind when specifying settings, that you are spoofing one visitor and not a group. For example, you would use the Location field to spoof the most specific location you can for a visitor, down to the zip code as opposed to spoofing a country.
Location
Preview the Campaign as if you were a visitor from the specified location. Make the location as specific as possible. SiteSpect auto-selects sub-locations.
For example, you want to spoof a visitor from Blue Hill, Maine. Select:
- Americas
- United States
- Maine
- Blue Hill
There is only one zip code in Blue Hill, Maine, so only one is listed.
However, if you choose:
- Americas
- United States
- Maine
- Portland
There are several zip codes in Portland, Maine. Select the one you want to spoof. SiteSpect defaults to the first one on the list.
Browser
Previews in your current browser, but tells SiteSpect that you're using the Browser specified here, which may affect Triggers and Audiences. For example, you may want SiteSpect to preview as if you were using a mobile device, but render it in your current browser.
Cookies
Specify Cookies to send to the engine/origin and back to the browser.
Headers
Specify headers to send to the engine/origin. You cannot use headers to set the User-Agent, Referer or Cookies; use the other fields in this dialog to set them.
Referring URL
Specify a URL to override the Referer header on all page requests.
Campaign Settings
The Campaign Settings tab allows you to select Campaigns and Variation Groups that you want to preview along with the preview of the currently selected Campaign. The top row of the table lists the currently selected Campaign with a check mark. You cannot deselect his Campaign.
To add Campaigns and Variation groups, select the box at the beginning of the row.
SiteSpect allows you to select only one Campaign from a non-overlay set. If the currently selected Campaign is a non-overlay Campaign, then you will not be allowed to selected another non-overlay Campaign; those Campaigns appear dimmed in the list.
You may select as many overlay Campaigns as you like.
Click Preview when you have made your selections.
For information about the Preview Panel, see Previewing Campaign Components.