We've created both a video and some step-by-step instructions to help you learn how to swap an image on one of your web pages using SiteSpect's find and replace tool.
This training video helps you learn how to build an image swap Campaign.
Image Swap Using Find & Replace – Step-by-step Instructions
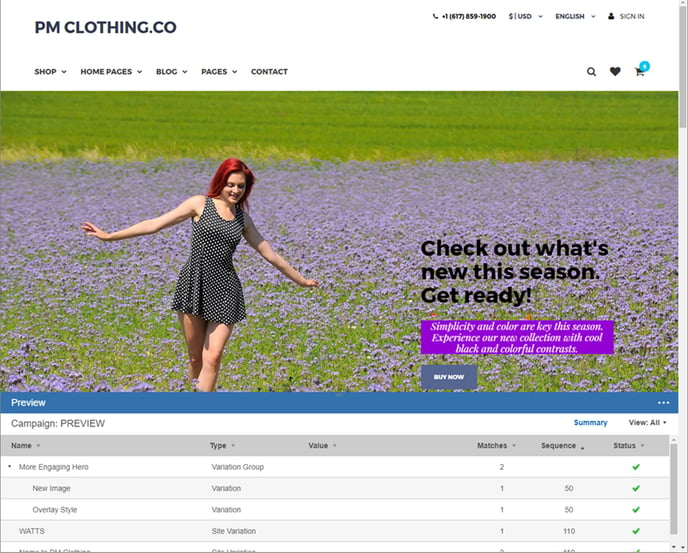
Your marketing department would like to test a new hero image that they believe will be more engaging and will result in more users clicking the Buy Now button. The following image shows the current PM Clothing.CO home page.

Your marketing department thinks that the following image will work better.

Step 1 – Create a New Campaign
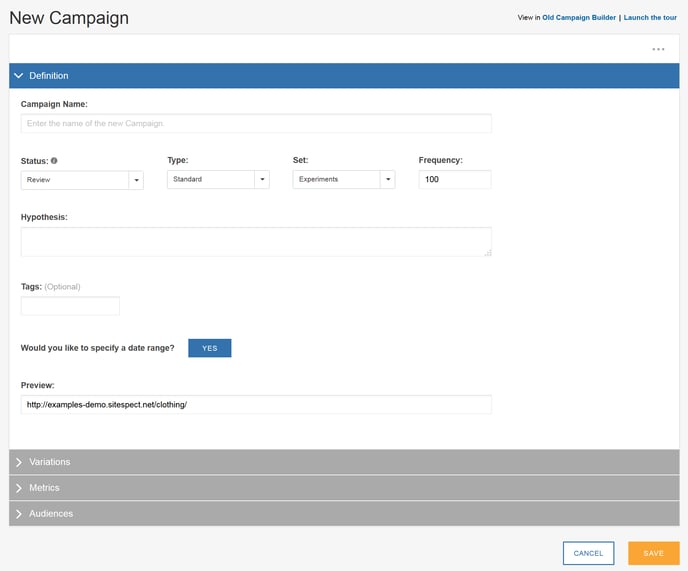
For this simple test, you’ll create a Campaign in SiteSpect's Campaign Builder. You can create most types of A/B tests using this simple, single-page form. To start creating the Campaign, select New, A/B Campaigns.
Step 2 – Specify the Campaign Name, Hypothesis, and Preview URL
To specify the Campaign Name, Hypothesis, and Preview URL:
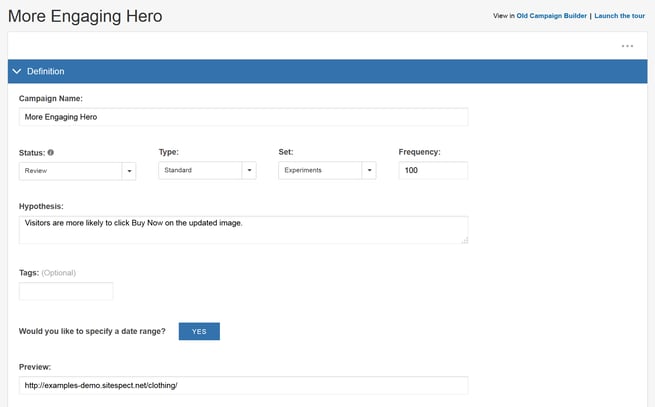
- Name the Campaign More Engaging Hero and select Standard as the Type.
-
Specify the following Hypothesis for the test: "Visitors are more likely to click Buy Now on the updated image." The Hypothesis helps others understand the why you designed the Campaign as you did and helps when it comes time for Campaign analytics.
Step 3 – Create a Variation
In this step, use SiteSpect’s Find and Replace method to change the URL of the hero image to the one you’d like to test.
-
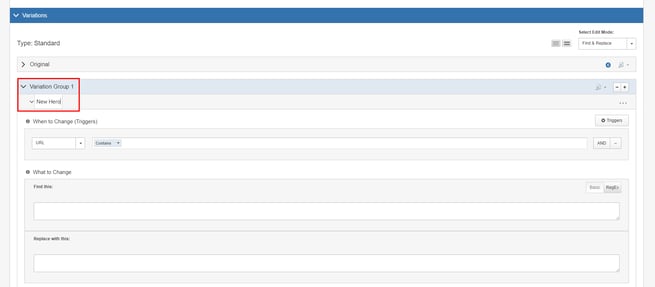
Change the name of Variation 1 to New Hero.
-
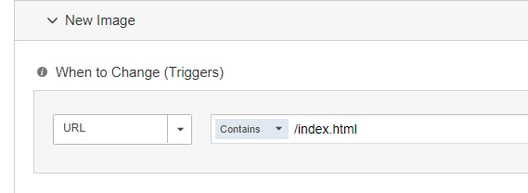
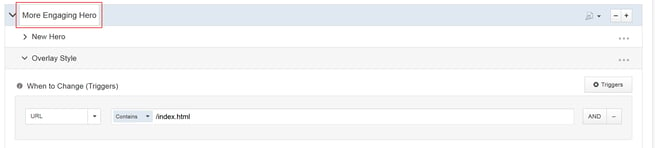
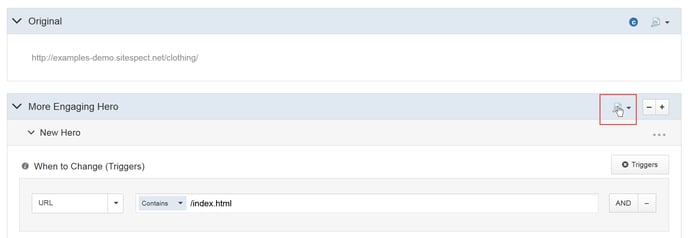
Specify the Trigger, which determines which pages to change. For this Campaign, enter /index.html. This means that changes are applied only when the URL contains /index.html. This is important because we want to make these changes only on the home page and not on any other pages.
-
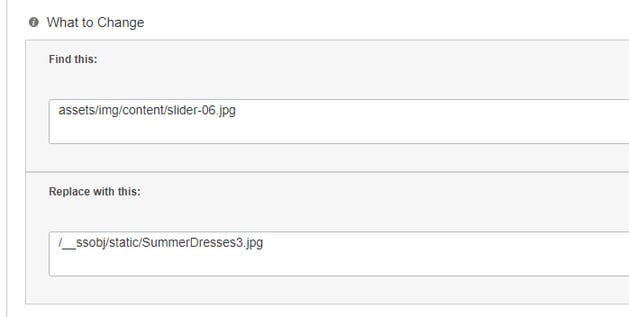
Specify the URL of the hero image in the Find This field, which determines what you want to change. The image below displays the URL as /assets/img/content/slider-06.jpg. This tells SiteSpect to locate this URL on the page.
-
Specify the URL of the new hero image in the Replace With This field, which determines the location of the replacement image. The image below displays the URL as /__ssobj/static/SummerDresses3.jpg. This tells SiteSpect to replace what it found in the Find This field with the contents of the Replace With This field.
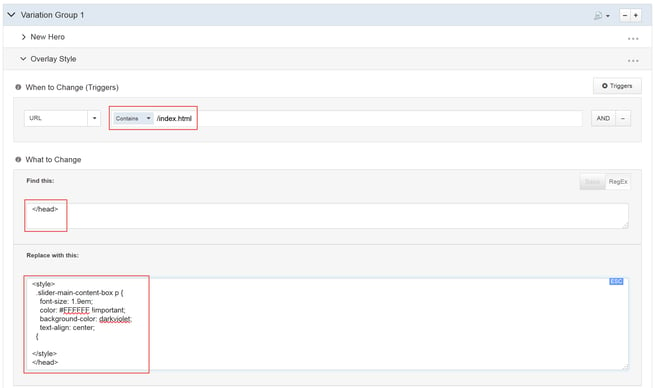
In addition to changing the image on the page, we're going to use this Variation to change the look of the secondary message that is called out in the following image.

To change the look of the secondary message so that it looks better with the new hero image, insert a style block before the closing </head> tag that specifies a new color as follows:
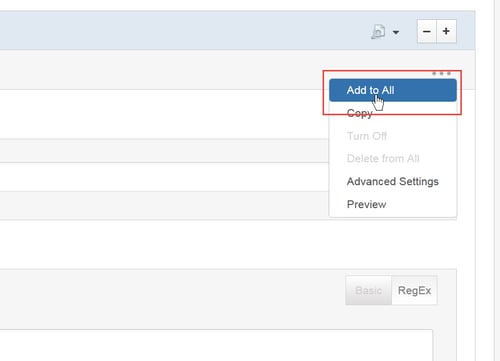
- To add a Variation to the Variation Group, open the three-dot menu on the right side of the page and select Add to All. In this second Variation, you’ll specify how to change that text style.
- Rename the new Variation to Overlay Style by clicking on the word Variation and typing over it.

- Create a URL Trigger, select Contains from the Trigger pull-down, and specify /index.html. In the Find This field, enter </head> so that SiteSpect searches for the closing head tag.
-
In the Replace With This field, enter the text that you see in the image below. The text is here for you to copy and paste.
-
Finally, rename Variation Group 1 to More Engaging Hero.
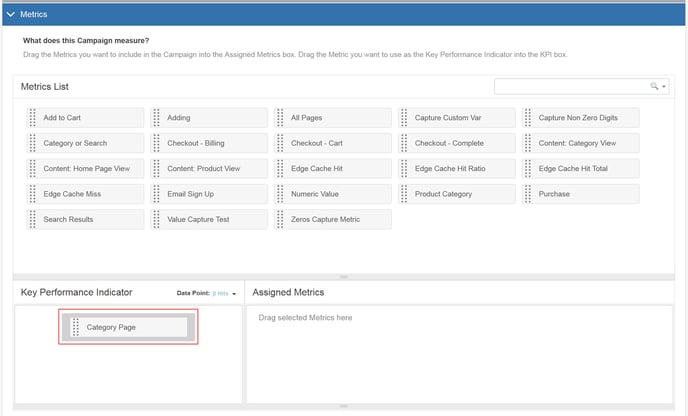
Step 4 – Select Metrics and a Key Performance Indicator
Drag and drop the Metrics that help you understand which Variation performed the best. The Key Performance Indicator (KPI) is the most important Metric for the A/B Campaign.
For this Campaign, you want to see if the new hero image increases the number of visitors who land on the Category Page, so drag and drop the Category Page Metric to the KPI area.
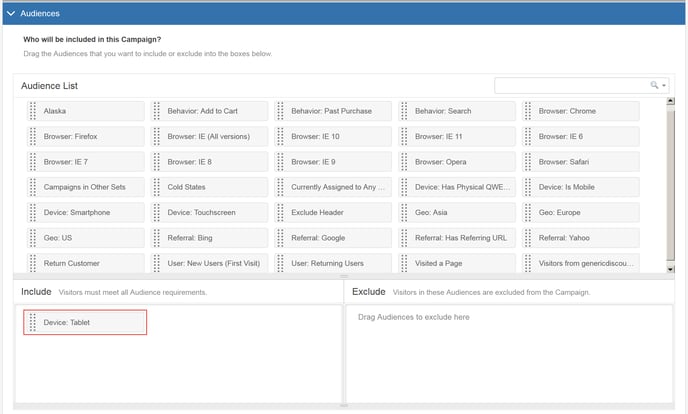
Step 5 – Select an Audience
For this test, you want to include only visitors who are using a tablet. Drag and drop the Device: Tablet Audience into the Include area.
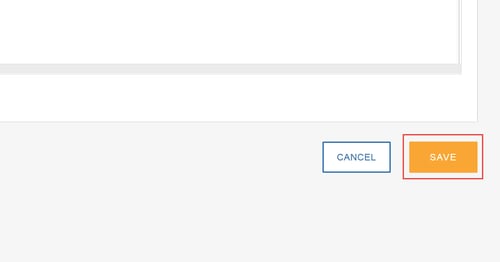
Step 6 – Save the Campaign
-
To save the Campaign, click Save.
Step 7 – QA the Campaign
To preview the Variation, click the Preview icon in the Variations area.
At the bottom of the page, the Preview Diagnostics panel displays the Variation changes applied to this page. Clicking the Buy Now button also displays the Category Page Metric in this area.
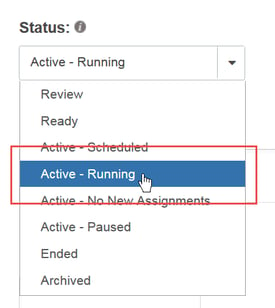
Step 8 – Set the Campaign to Active – Running
When you first create a Campaign, it is in Review. After QA is complete, you can change the Status to Active – Running, which turns the Campaign on and allows visitors to be assigned to either the Control or the Variation. To change the Status of the Campaign:
- Open the Campaign again: select Build, Campaigns, Campaign List, then select the Campaign.
-
In the Status field, select Active - Running.
- Click Save at the bottom of the page.
Step 9 – Results
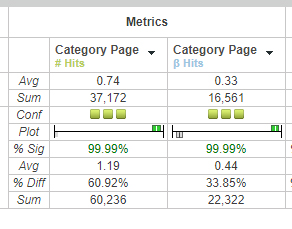
The A/B Campaign has been running for two weeks now, and you’re ready to look at the results. The Performance Matrix shows comparisons of Metrics between the Control and Variation hero image.
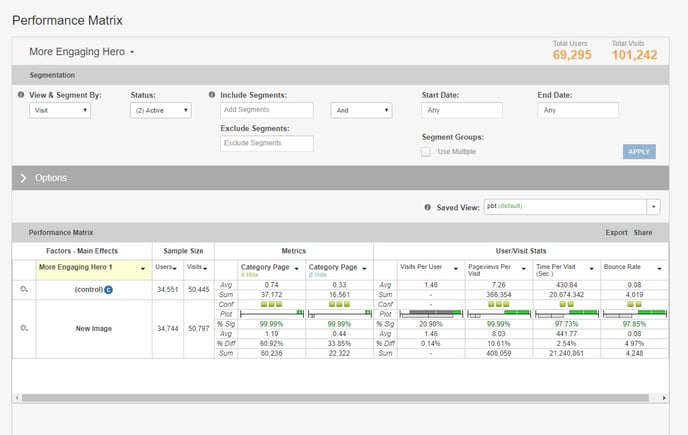
In the Metrics section, you can see a 60.92% lift in views (Totals) of the Category Page from 33.85% more visits (Uniques) than in the Control. Both comparisons are reporting at full confidence (99.99% Sig).
A/B Campaign Conclusion: Your new hero image encouraged more users to click through to the Category page.