Client-Side triggers are available for use in Metrics, Campaigns, Global Changes, and Factors. Among them is the Hash Trigger. A Hash Trigger allows you to match from the hash sign forward. The Hash consists of anything from the first # to the end of the URL. Single-page apps sometimes use the hash to simulate paths.
For example, in the following URL:
http://www.mysite.com/#/products/shirts/01950
The hash is #/products/shirts/01950.
A hash trigger with the definition:
Contains: /products/
Will match on all pages that have /products/ in the hash, which in this case will be all product pages.
When this Trigger is satisfied, SiteSpect applies the changes specified in the What to Change area.
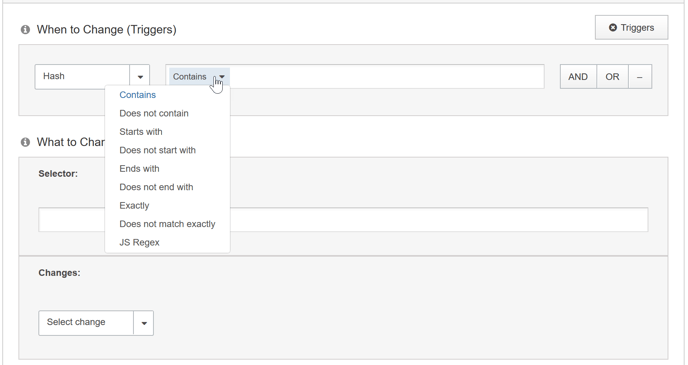
Within Metrics and Campaigns, SiteSpect offers several matching options to help refine your trigger definition. The entire list of Hash options are:
- Exactly ("Equals" in SuperFresh) – The text that you are matching must be exactly what you enter here.
- Does not match exactly ("Doesn't equal" in SuperFresh) – The text that you are matching must not be exactly what you enter here.
- Contains – The text that you are matching must contain what you enter here. The text can be anywhere within the Path.
- Does not contain – The text that you are matching must not contain what you enter here.
- Starts with – The text that you are matching must begin with what you enter here. It must be at the beginning of the Path.
- Does not start with – The text that you are matching must not begin with what you enter here.
- Ends with – The text that you are matching must end with what you enter here. It must be at the end of the Path.
- Does not end with – The text that you are matching must not end with what you enter here.
- JS Regex ("Matches JS regex" in SuperFresh) – Describe the text you want to match using JavaScript Regex.
What to Change
Selector
Use the Selector field to enter the name of a CSS Selector. When a page component matches this Selector, SiteSpect applies the settings specified in the Changes field.
Changes
The Changes field defines exactly what you want to use replace what the Selector specifies. There are several options:
- Insert HTML – Replaces the HTML content of the selected component.
- Set Attribute – Replaces the Attribute with the specified value if the Attribute exists. If the Attribute does not exist, this adds it. Enter the name of the Attribute on the left side of the field and the Value on the right side.
- Set CSS – Replaces the CSS rule with the specified value if the rule exists. If the CSS rule does not exists, this adds it. Enter the rule on the left side of the field and the value on the right. Note that if there is an !important rule, this won't override it unless this rule is also !important.
- Custom – Lets you provide JavaScript code to execute on each matching component. The first line and the last line of the field are not editable. Note that this function is run against each matching component. In addition, each time it's run, the current component it's working on can be accessed with the keyword this.