SiteSpect allows you to select five Segments and one Metric to use on your Top Segments page. In addition, you can specify some defaults about what SiteSpect displays. Keep the following in mind:
- You can change metrics on the fly.
- However, if you change Segments, SiteSpect must re-generate the report.
To configure Top Segments:
- Select Campaigns and select a Status.
- Select the Campaign whose Top Segments you want to review.
- Select Analytics from the Campaign menu.
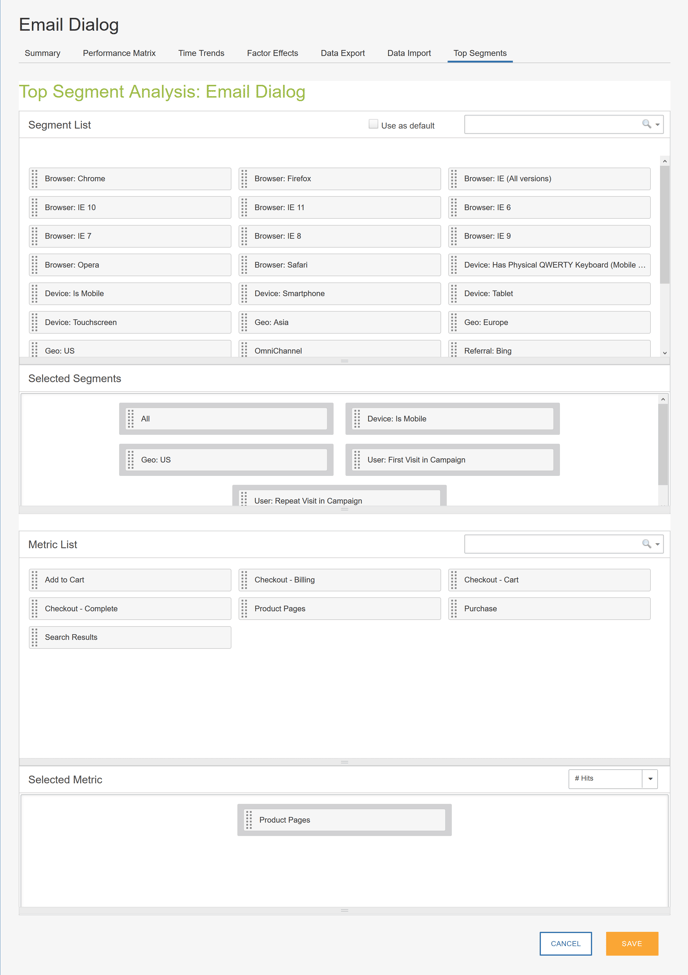
- Select the Top Segments tab. The Top Segments page opens.
- Click the Gear icon at the top right corner to open the Configure Top Segments page.
Selecting Segments
The top part of the Configure Top Segments page allows you to select the five Segments you want to include in your Top Segments report. To select Segments for your Top Segments report:
- Click a Segment in the Segment List section of the page.
- Drag the Segment to the Selected Segments section of the page.
- Select Use as Default if you want to use the five Segments you select as the default Segments for Top Segments reports for Campaigns you will create in the future.
Note: The All Segment represents all visits to the Campaign.
Selecting a Metric
The bottom part of the Configure Top Segments page allows you to select the one Metric to include in your Top Segments report. The Metrics that are listed are those you included in the Campaign.
To select Segments for your Top Segments report:
- Click a Metric in the Metric List section of the page.
- Drag the Metric to the Selected Metric section of the page.
- Select the Data Point you want to view on the Top Segments report from the Select Data Point drop-down. The selections on the Data Point drop-down depend on the Data Points you selected when you defined this Metric.
Saving Your Settings
Click Save at the bottom of the page to save the settings you make on this page.