SiteSpect's Visual Editor allows you to make many changes to your webpages to update its visual appearance. One such change is the ability to add links to an element on a page or multiple pages across your site.
1) Open your site in SiteSpect's Visual Editor.
2) Navigate to the page(s) that contain the element you wish to modify using Go To Page, Preview mode or right click 'Click Element' for the Visual Editor.
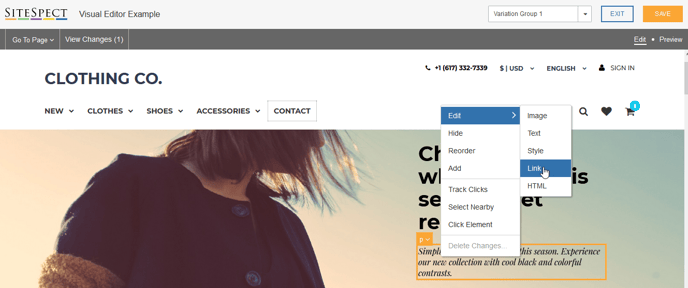
3) Hover over the element you wish to change and select it with a left click. Once selected, the element will have an orange border. A right click within this border will present you with options to modify the element.
4) Select the Edit > Link option.
5) Once selected, you will be presented with options to modify the text, destination URL and tool tip for your link. You can also specify whether a click on this element will open the page in the same or a new tab.
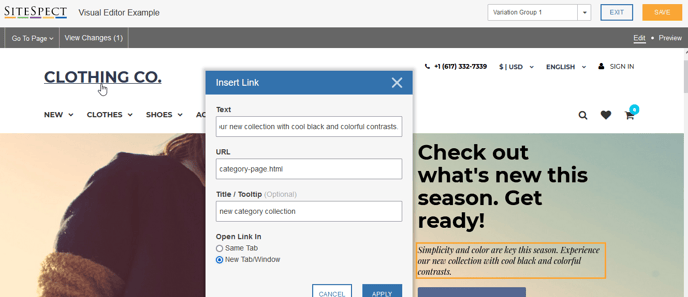
6) Click Apply to submit the change.

7) Toggle to Preview Mode or right click 'Click Element' to enable you to simulate a click on the element with the Visual Editor. This will confirm the new link works as expected and delivers you to the new page.

You can also use the Visual Editor to remove an existing link:
1) Hover over the element you wish to change and select it with a left click. Ensure that the element selected is a link element (a). Once selected, the element will have an orange border. A right click within this border will present you with options to modify the element.
2) Select the Edit > Link option.
3) To remove the link, click the Remove Link button that appears at the bottom left.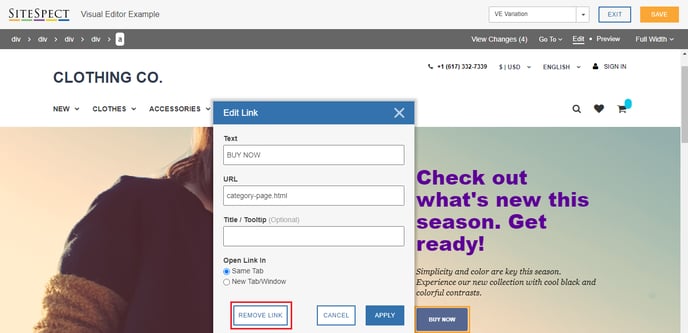
The link element is immediately removed. Toggle to Preview Mode or right click 'Click Element' to simulate a click on the element with the Visual Editor. This will confirm that no link is present.